![venari-security-logo-2022-1.png]](https://vhub.venarisecurity.com/hs-fs/hubfs/Imported%20images/venari-security-logo-2022-1.png?height=40&name=venari-security-logo-2022-1.png)
Internal Discovery Scans use the scanner on your Venari sensor to actively probe private network assets from inside your environment.
Prerequisites
Before you start, make sure that:
- A Venari sensor is deployed and connected to the platform
- The sensor’s scanner appears as online in the Discovery Console
- Your organisation has the Internal Discovery capability enabled
Step 1: Access the Discovery Console
- Log in to your Venari Platform account.
-
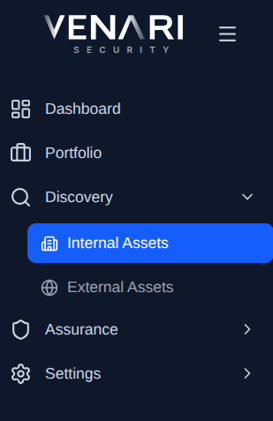
From the left-hand menu, navigate to:
-
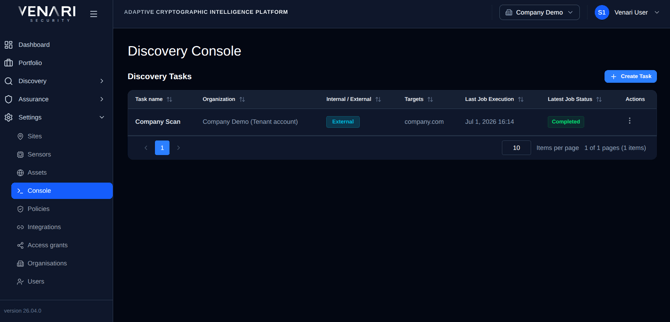
Settings → Console
-
-
Click the “Create Task” button (top-right).
-
This opens the task creation window.
Step 2: Configure Your Scan Task
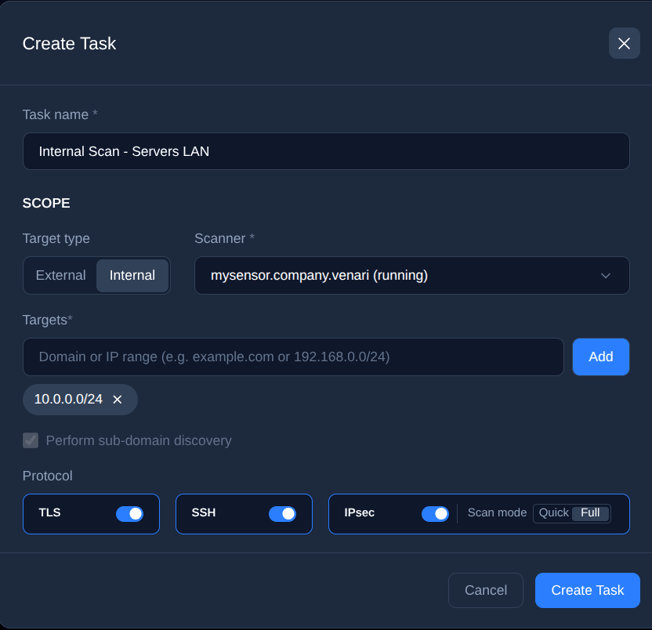
1. Task Name
Enter a descriptive name (e.g., Internal Scan - Servers LAN).
2. Scope Configuration
-
Target Type: Select Internal
-
Scanner: Select the sensor scanner that should run the scan.
If no scanners are listed when creating a task, contact Venari Support to confirm sensor registration and connectivity.
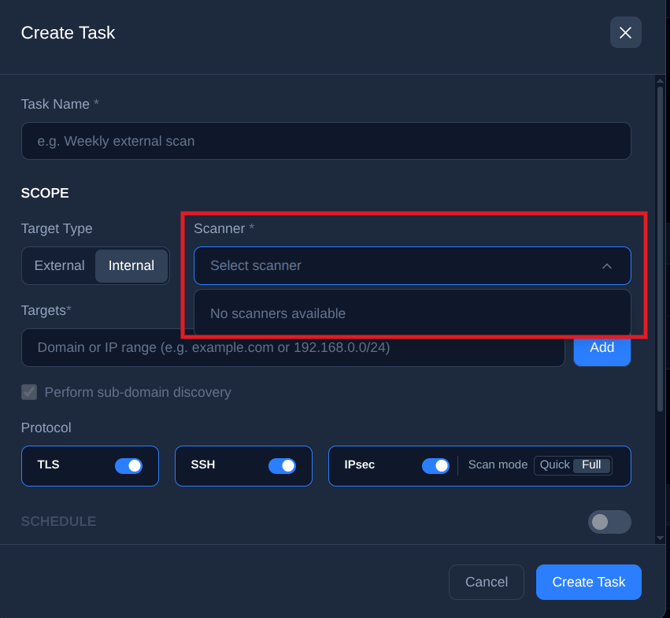
The scanner must be able to reach the targets on your private network.
3. Targets
Enter one or more:
- Private IPs (e.g.,
10.0.0.15,192.168.1.10) - Private IP ranges in CIDR format (e.g.,
10.0.0.0/24,192.168.0.0/16) - Domain names resolvable from the sensor’s network (e.g.,
intranet.example.com)
Ensure all IPs are private. Public IPs and public ranges are rejected for internal scans.
Important Note
Only scan internal assets you are explicitly authorized to scan:
- Private networks owned or operated by your organisation
- Partner or customer internal ranges (only with formal approval)
Unauthorized scanning may violate legal, contractual, or compliance requirements. Prefer smaller CIDR ranges first before scanning large private networks.
4. Protocol Selection
Choose which services to scan:
- TLS – HTTPS / certificates
- SSH – Remote access endpoints
- IPsec – VPN services
- For IPsec:
-
-
- Quick scan → faster scanning of a curated set of IPsec transforms
- Full scan → more thorough scanning, going through all IPsec transforms (can take hours)
-
Note: Sub-domain discovery is available for external scans only. It is not used for internal scan tasks.
Step 3: Launch or Schedule the Scan
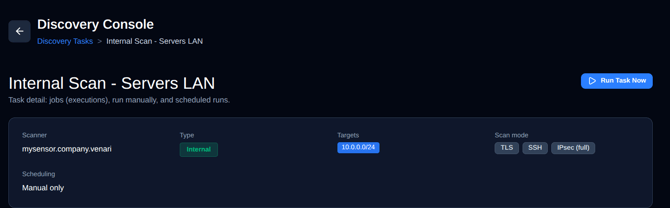
Option A: Immediate Scan
-
Click “Create Task”
-
Then click the Run task now button that appears afterward.
Option B: Scheduled Scan
-
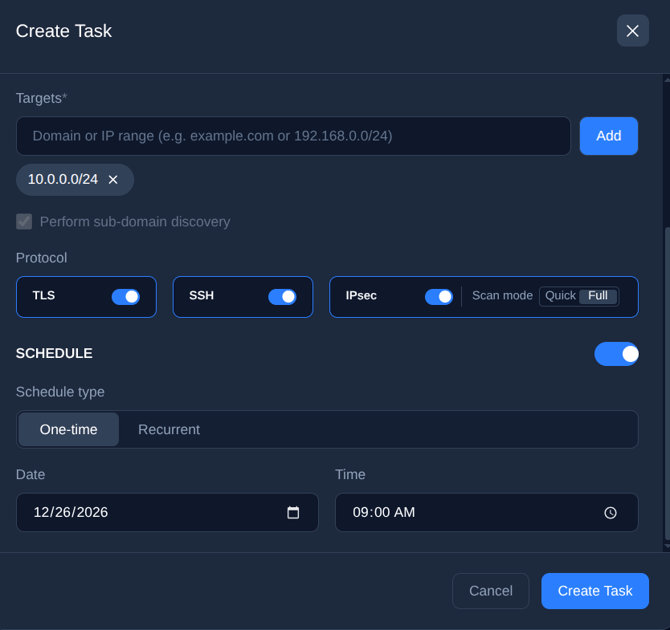
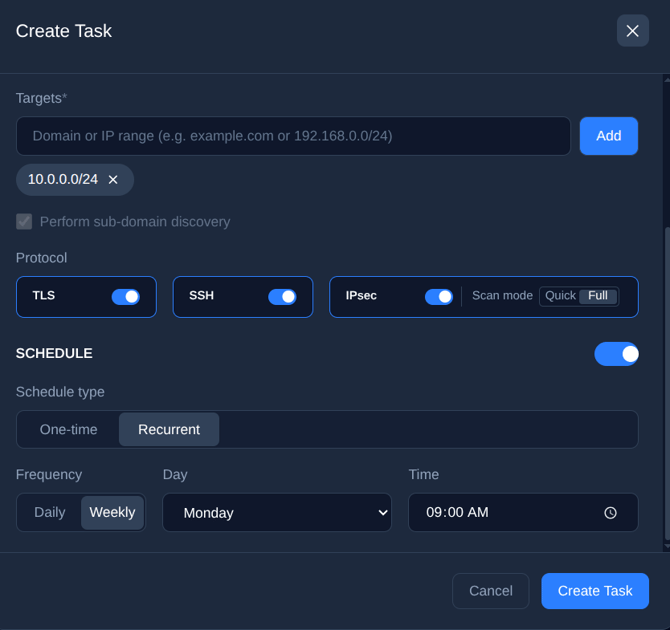
Enable the Schedule toggle
-
Choose:
- One-time → Set a specific date & time
- Recurrent → Daily or weekly execution
- One-time → Set a specific date & time
Step 4: Monitor Scan Progress
Once triggered, the platform shows:
- Status: In Progress, Failed, Completed
- Progress percentage (when actual scanning of discovered assets begins)
You can open the task details to follow job progress for TLS, SSH, and IPsec.
Step 5: View Results
You can check the scan results in the Discovery → Internal Assets page or in the Dashboard.
Discovery → Internal Assets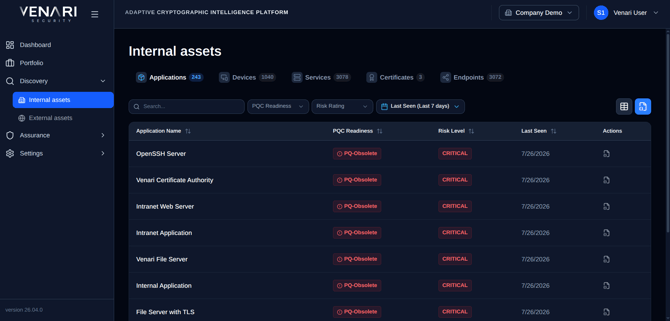
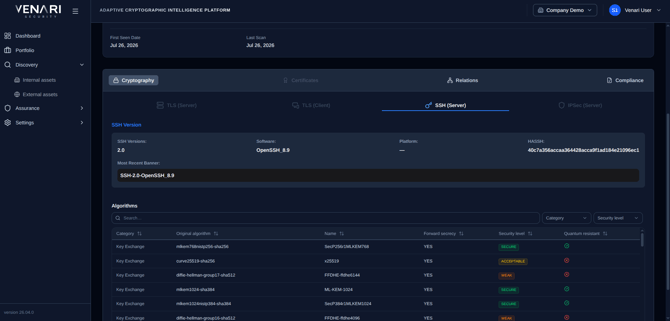
View discovered assets:
- Applications
- Devices
- Services
- Certificates
- Endpoints
Export options:
- CBOM
- CSV
Enable Assurance Policies to assess your assets' compliance with industry security standards and generate actionable findings.
Need Help?
If you encounter any issues with the scans or the platform or have any questions, we're here to help. Please visit this page for more information on how to get in touch with Venari's Support team